Function
- Reduction of fractures
- Maintaining fracture reduction
- Immobilization of joint
- Rest
- Pain relief
Usage of Traction
-
Uses pulling force to a part of the body to overcome
- Muscle spasm
- Shortening
- Gravity
-
Parts used at:
- Limbs
- Spine
- Pelvis
Usage of Traction
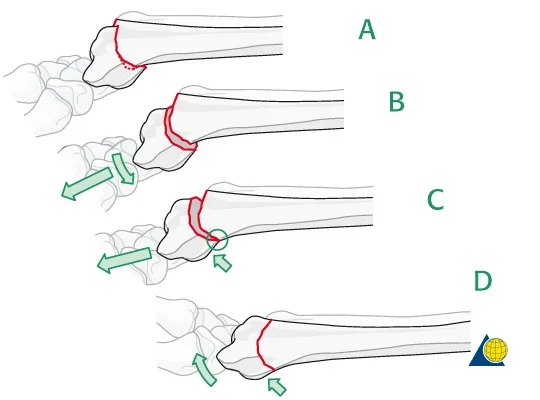
- Restoring and maintaining bone alignment following fractures * By: Ligamentotaxis / Muscle tightening
- Resting inflamed joint and maintaining them in functional position
- Relieving pain due to muscle spasm
- Gradually correcting deformity due to contracted soft tissue
Types of Traction
- Manual traction
- Skin traction
- Skeletal traction
- Traction by gravity

Manual Traction
- Exerted directly when the physician pulls on the part during manipulation to obtain closed reduction of a fracture or dislocation
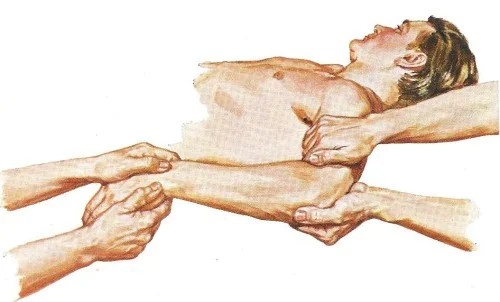
Manual Traction
- Exerted directly when the physician pulls on the part during manipulation to obtain closed reduction of a fracture or dislocation
- Look up fracture reduction techniques on YouTube
Skin Traction
- Traction is applied on skin
- By adhesive or non-adhesive strapping
- More commonly used in children
- Temporary management in adults
- Duration limit < 3 weeks
- Weight limit < 10 pounds (4.5 Kg)
Advantages
- Easy to apply
- No hazard of bone infection or epiphyseal plate injury
Disadvantages
- Costly in terms of hospital stay
- Hazards of prolonged bed rest
- Thromboembolism
- Decubitus ulcers
- Pneumonia, UTI
- Depression, …
- Requires meticulous nursing care
Contraindications
- Diseases predisposing to skin damage and poor healing
- (DM, varicose ulcers and usage of steroids)
- Wounds, sores or rash
- Marked swelling
- History of hypersensitive skin
- Suspicion of circulatory problem

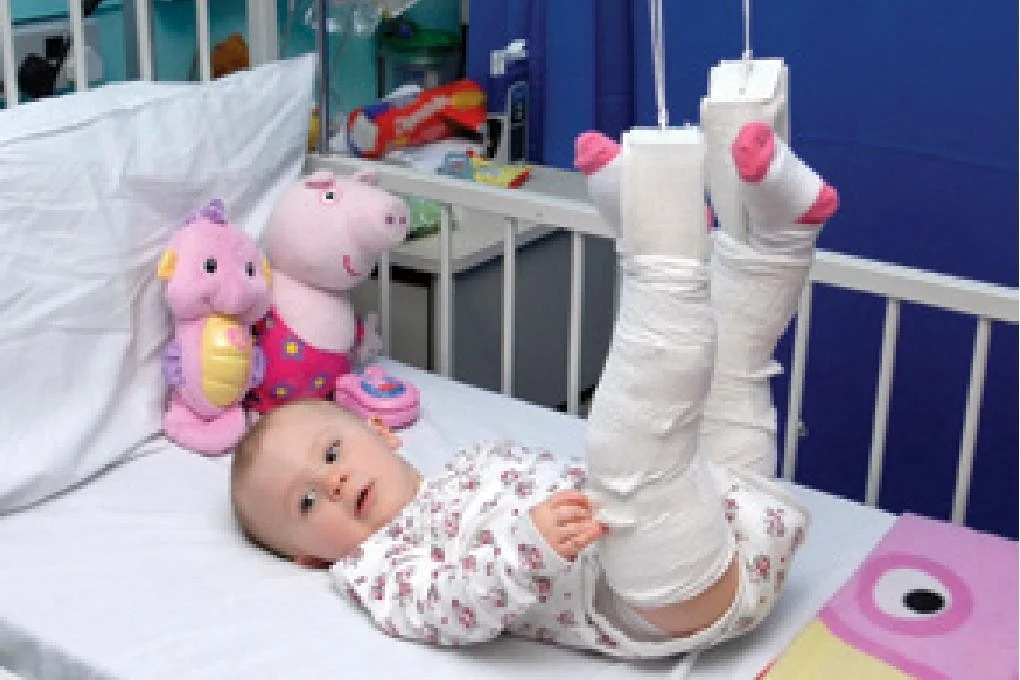
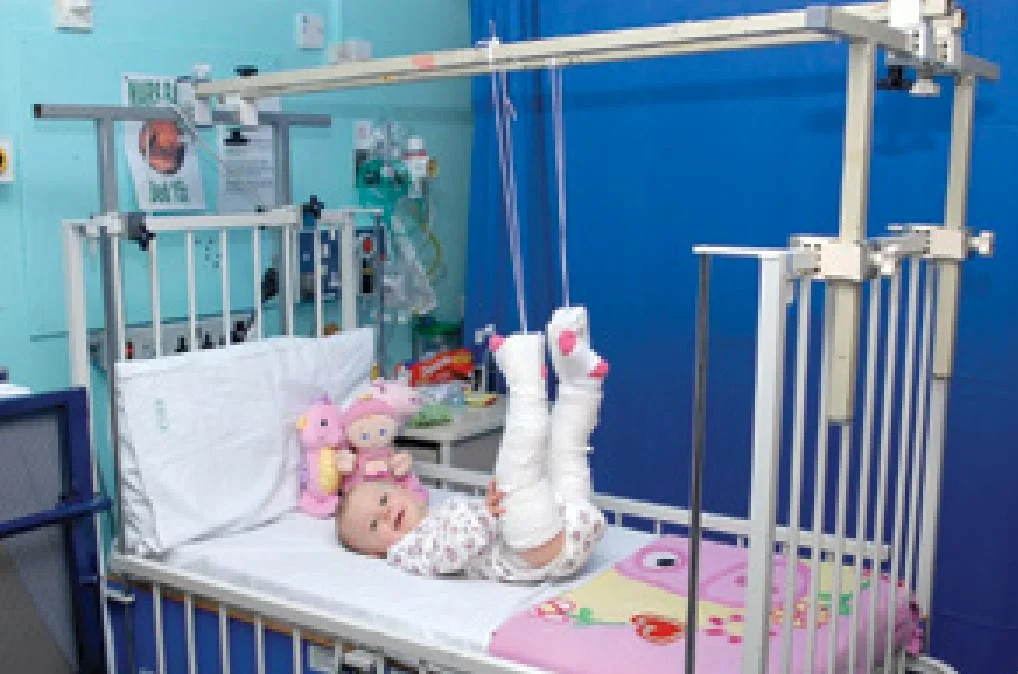
Skin Traction - Types
- Gallows
- For femoral fracture
- Children < 2yrs age, maximum body weight 10-12 Kg
- If more, may affect circulation
- Hips flexed 90°
Fixed traction For transport
- Using Thomas splint
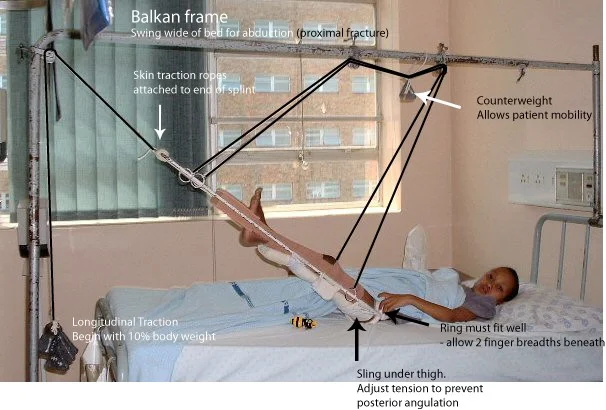
Balanced traction For treatment
- Using Thomas splint
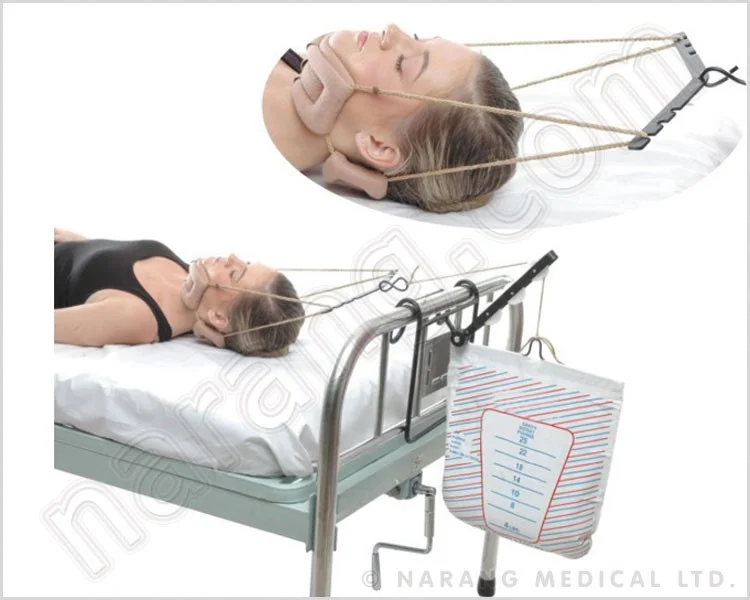
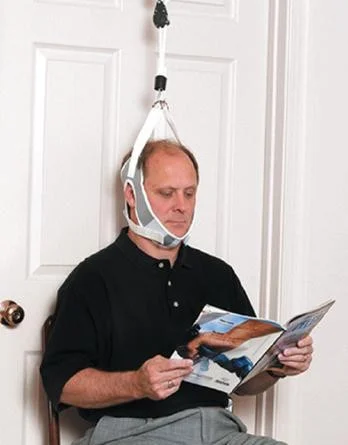
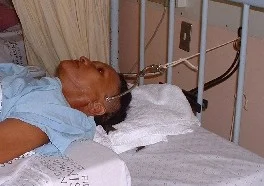
Cervical skin traction
- Temporary in trauma & for cervical disc / spondylosis
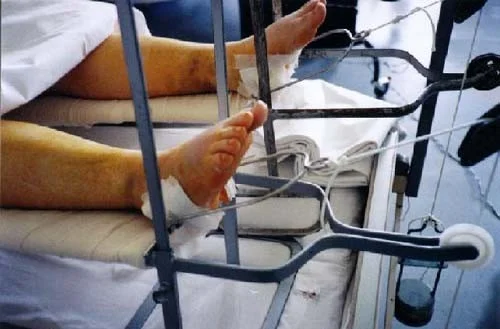
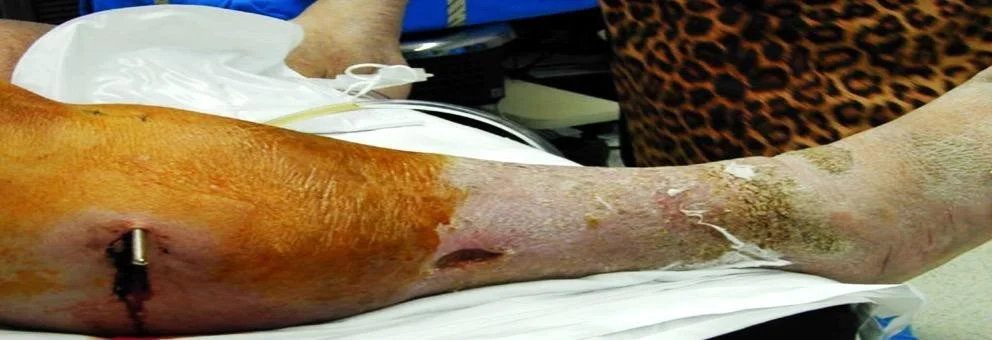
Skeletal Traction
By inserting a metal (Steinman pin) into the bone and applying traction on it
-
Indications:
- Adults where surgical treatment of fractures is not possible or not desirable
- When a strong force is needed
- (weight more than 4-5 Kg) ( Adults )
- When traction is needed for more than 3 weeks
- To avoid skin blisters
-
Common sites for pin insertion:
- Upper tibia
- Femoral condyle
- Calcaneum
- Skull
Skeletal Traction - Complications
- Infection
- Over distraction of the bone fragments
- Nerve damage
- From heavy traction force
- Direct during insertion!
- e.g. Common Peroneal n.
- Bone fragmentation/break
- Breaking of the pin
Traction
For detailed information on indications, contraindications, advantages, disadvantages, and complications, see presentation: “Conservative Treatment of Fractures”
Skin Traction
- Uses:
- Treat fractures in children
- Temporary immobilization of fractures in adults
- Rest an inflamed hip joint and reduce pain
- Gradually realign a joint (e.g. flexion deformity of hip)
Types of Skin Traction
Adhesive:
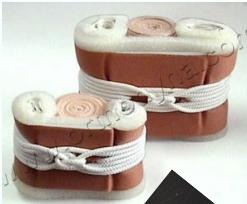
Non-adhesive:
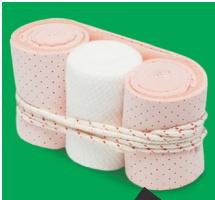
Foam:
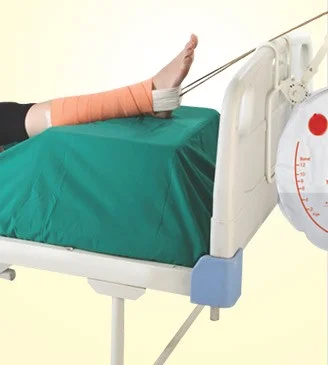
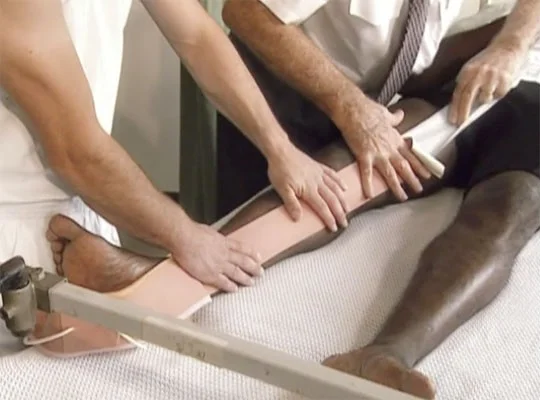
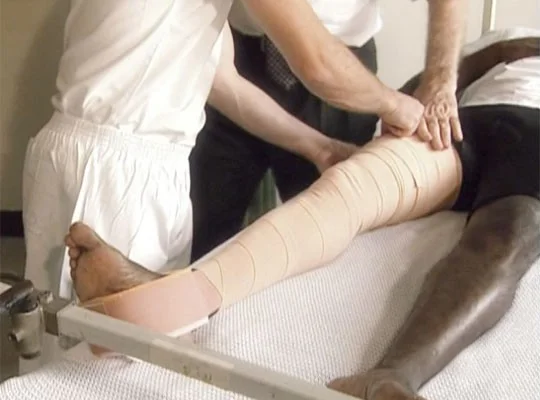
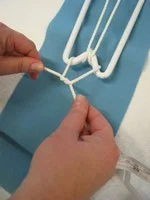
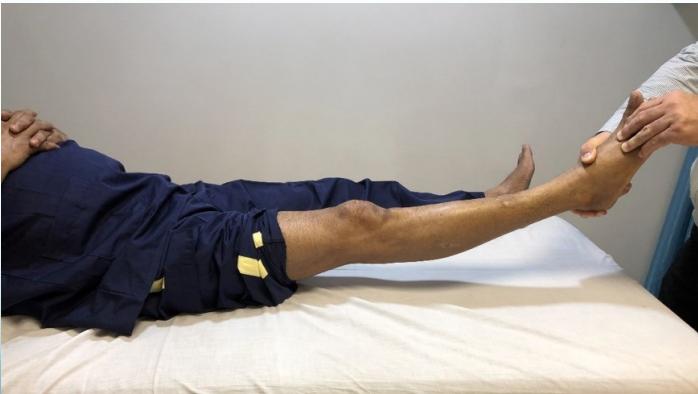
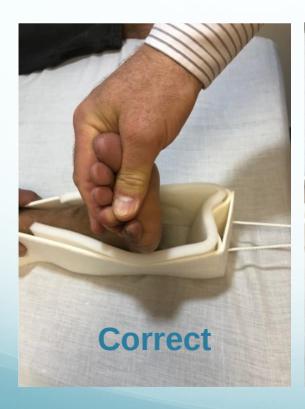
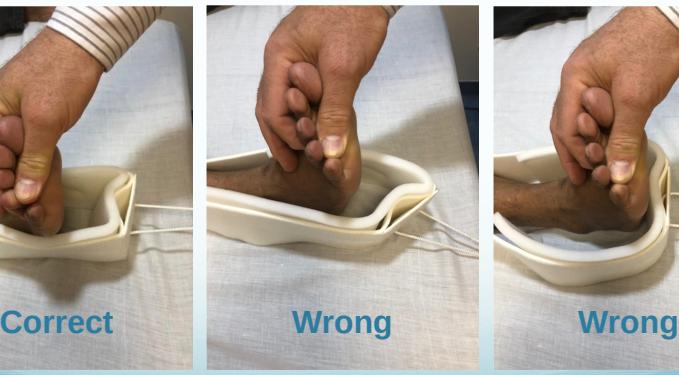
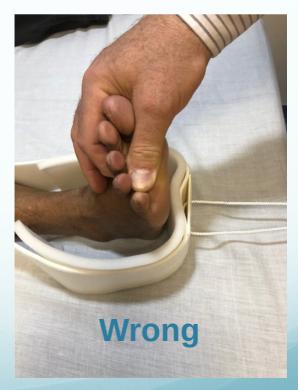
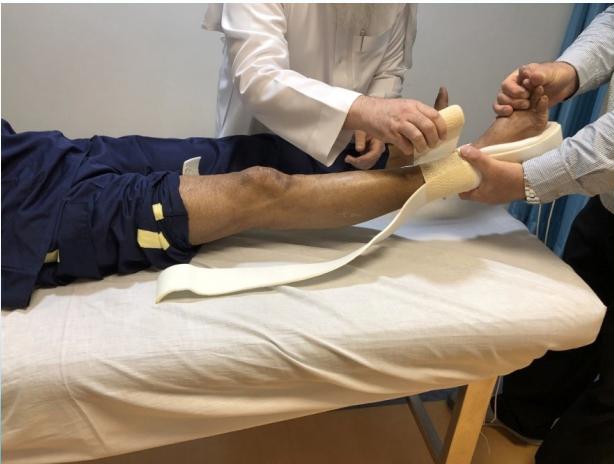
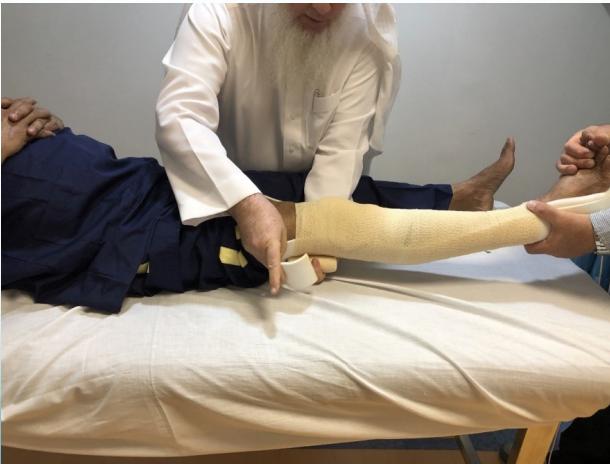
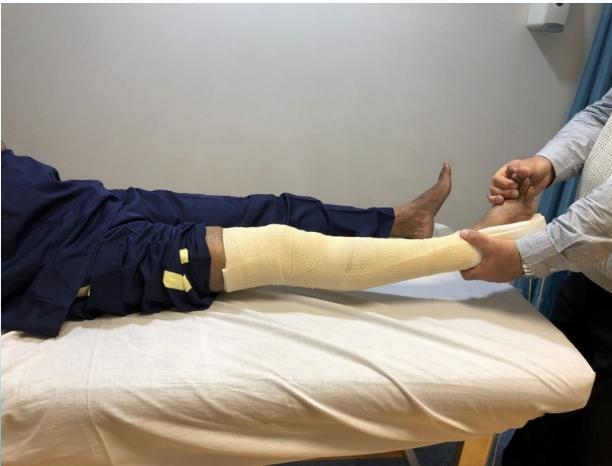
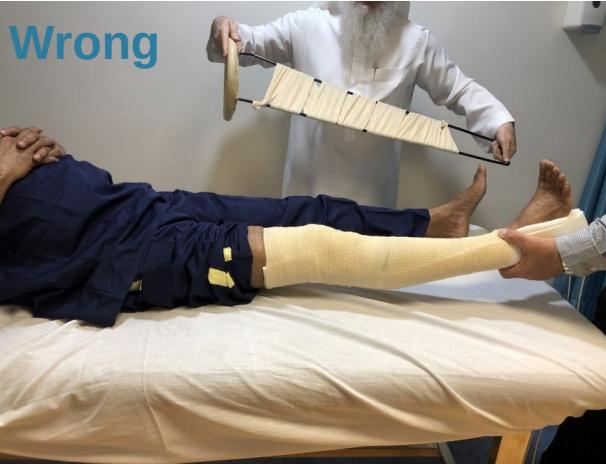
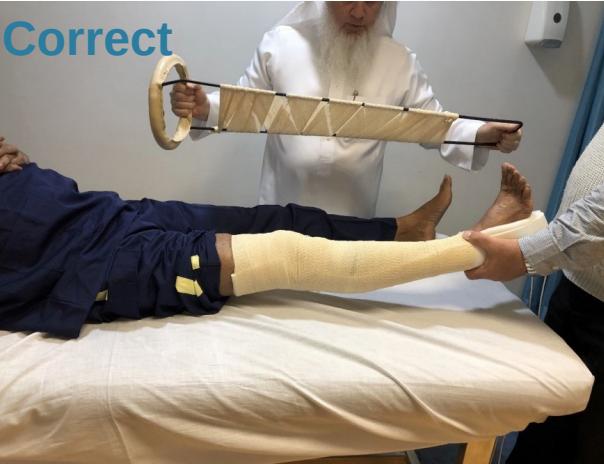
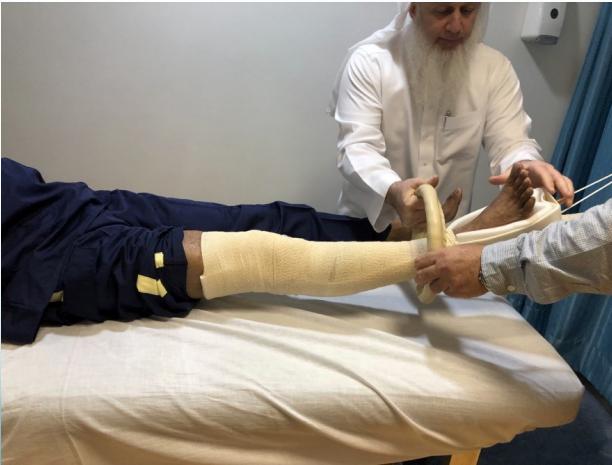
Application of Skin Traction
Procedure:
- Need two persons
- Manual traction by assistant to realign limb and reduce pain
- Apply skin traction with centralized end piece for correct traction pull
- Keep away from heel skin (5cm)
- Smoothly apply traction tape on skin
- Apply bandage evenly with 50% overlap, not too tight, not too loose
- Upper part should stop below level of fracture
- Assistant continues pulling throughout the procedure

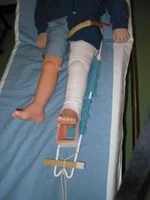
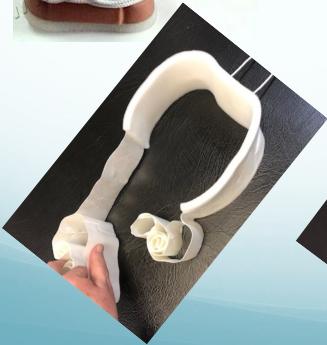
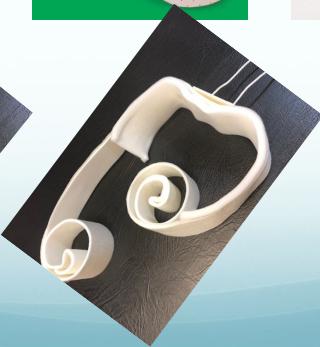
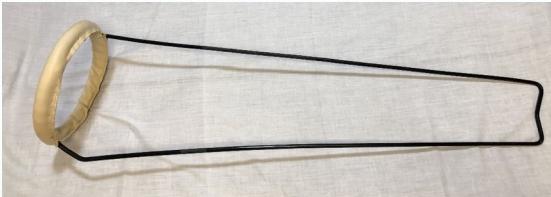
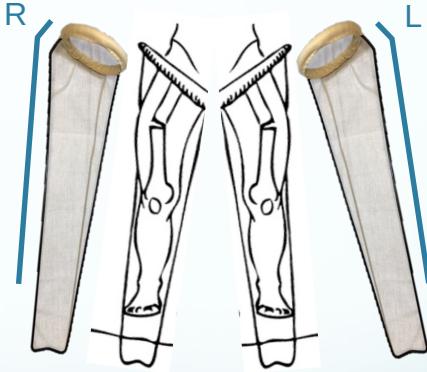
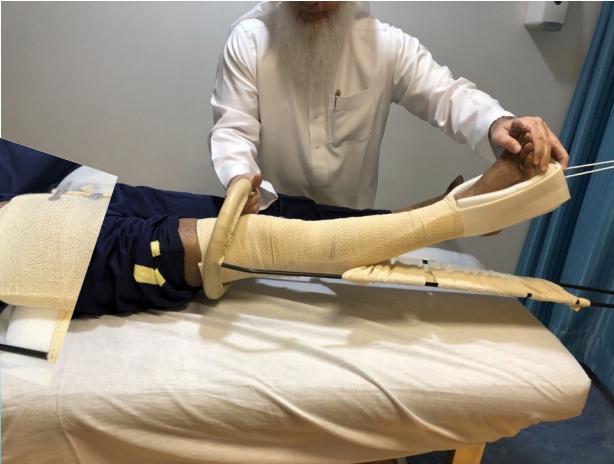
Traction Splints
Thomas Splint
- Indications:
- Immobilization of femur fractures for transportation of patients
- Apply fixed traction at end of splint
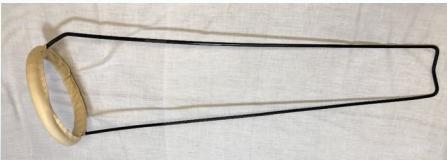
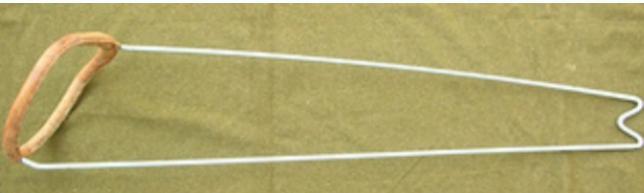
Parts of Thomas Splint:
- A. Ring
- B. Lateral bar (angulated)
- C. Medial bar
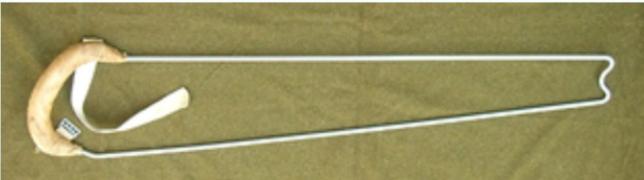
Types:
- Complete ring: original design
- Half-ring: easier to apply
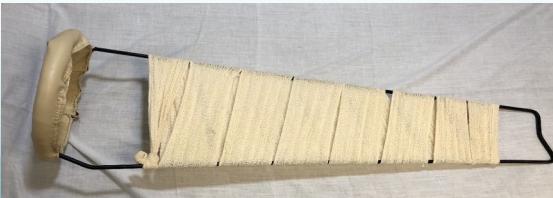

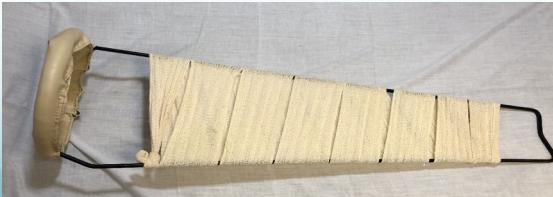
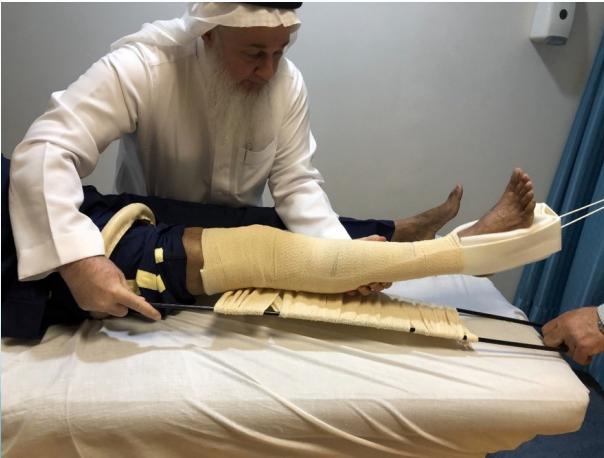
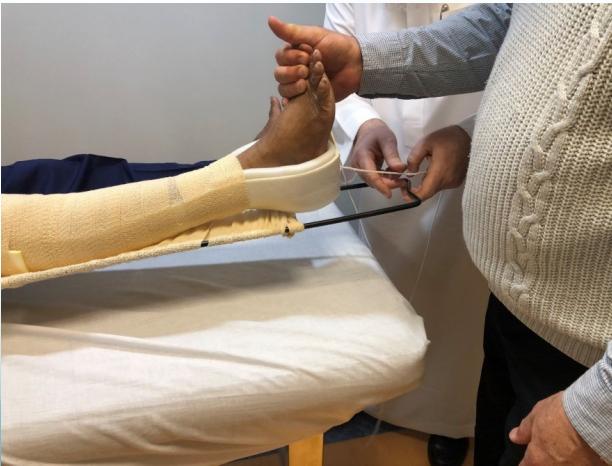
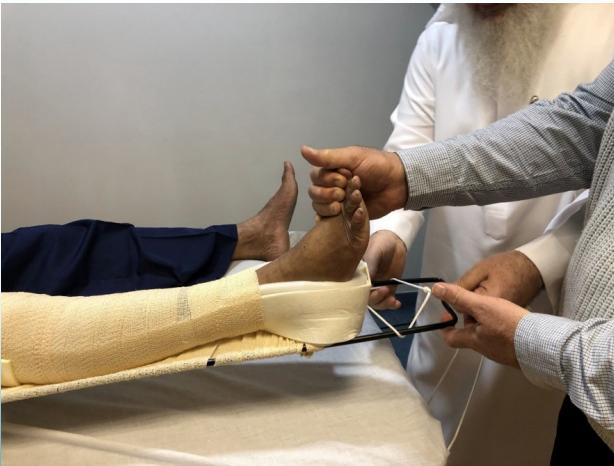
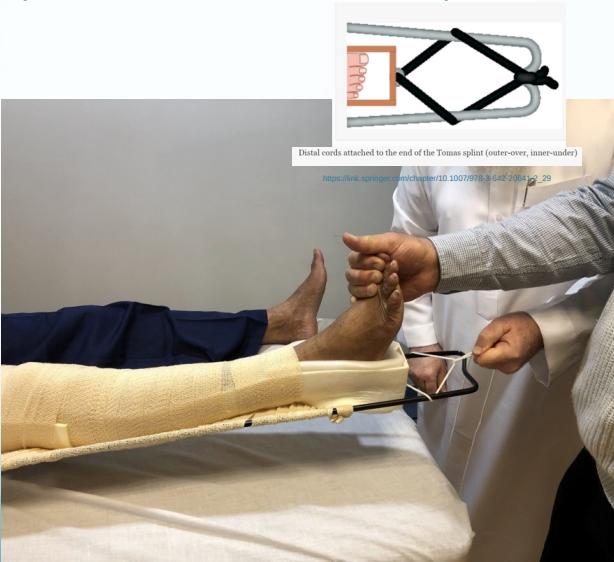
Application Procedure: osce
- Prepare splint by adding bandage or foam pads between medial and lateral bars
- Apply Thomas splint correctly while assistant continues pulling
- Angulated bar on lateral side
- Push the ring as high as possible
- Pull rope and fix to end of Thomas splint
- Apply pillow under the splint (no pressure under the heel)
- Check tightness of rope


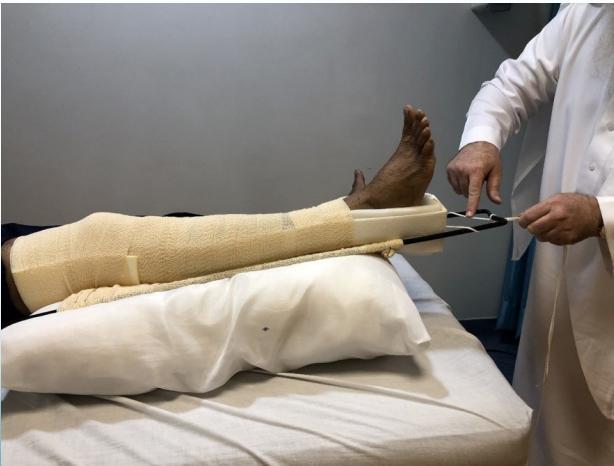
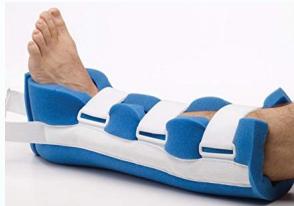
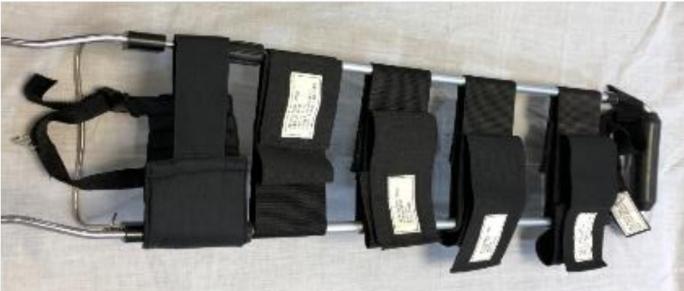
Modern Traction Splint
- The modern traction splint
- Can easily hold lower limb with straps
- Can easily apply fixed traction
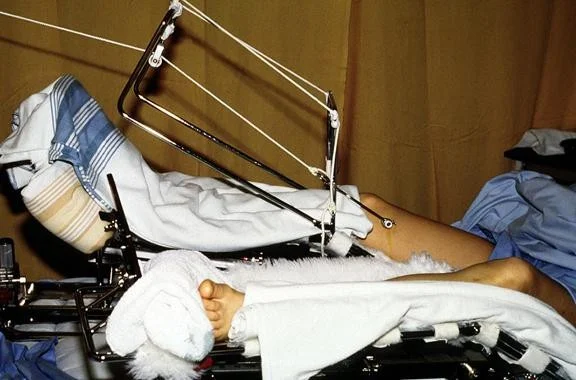
Skeletal Traction
- Method: Inserting a metal (Steinman pin) into the bone and applying traction on it
-
Indications:
- When skin traction is contraindicated
- When the weight needed is >10 Lbs. (4.5 Kg)
- When the traction needs to be applied for >3 weeks
-
Advantages:
- Reduces fractures: Regains length and alignment
- Maintains reduction of fractures
- Reduces pain and overcomes muscle spasm
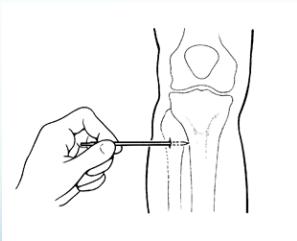
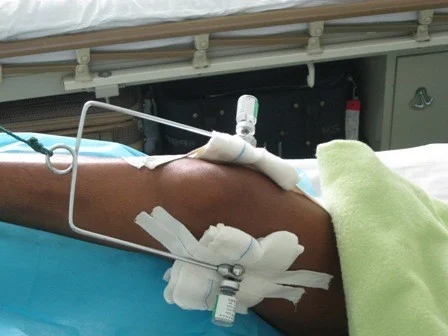
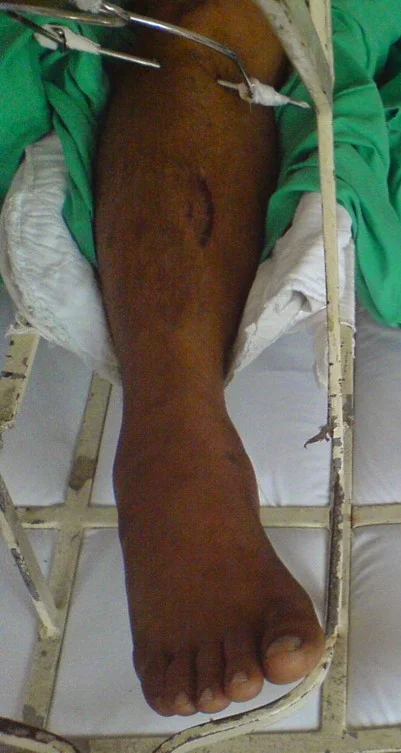
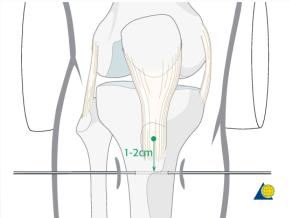
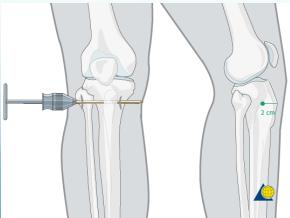
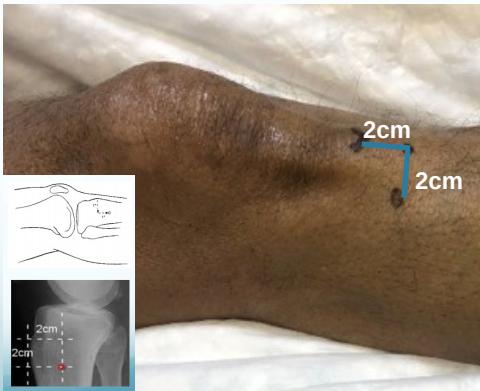
Entry Points
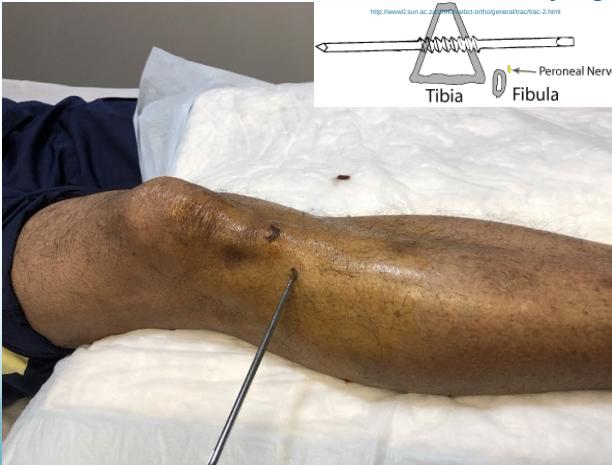
Proximal tibial site:
- Insert pin laterally at a point 2cm distal and 2cm posterior (lateral) to the Tibial tuberosity and exit medially to avoid injury to the common peroneal nerve
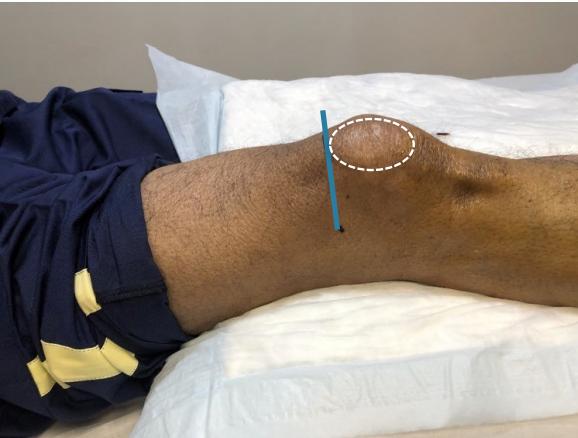
Distal femoral site:
- Insert pin medially at level of upper patella in-line with mid-femur and exit laterally
- This level avoids popliteal vascular damage and intra-articular injury
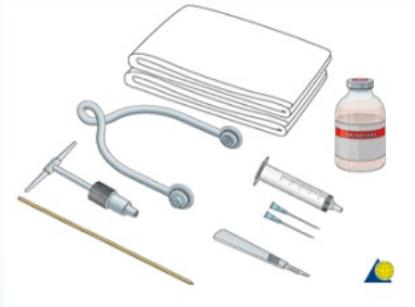
Preparation and Technique
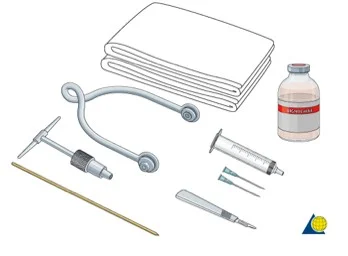
Equipment needed:
- Disinfectant
- Sterile towels
- Needles and Syringe
- Local anesthetic
- Scalpel with pointed blade
- Sharp pointed Steinmann pin
- T-handle
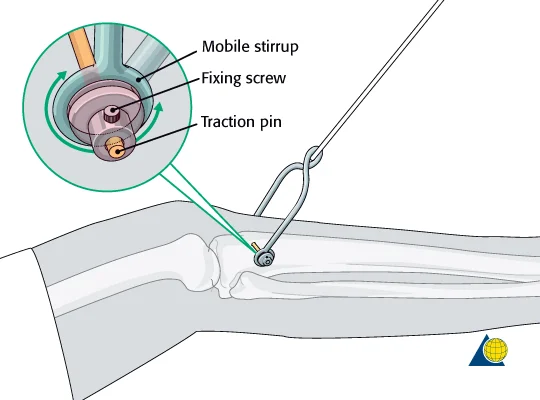
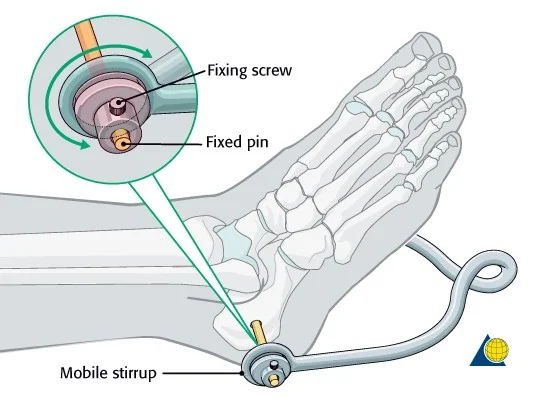
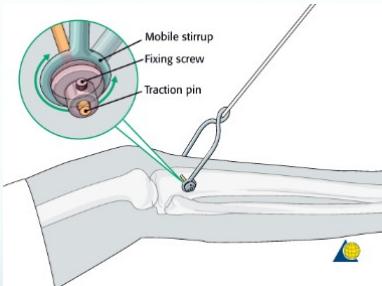
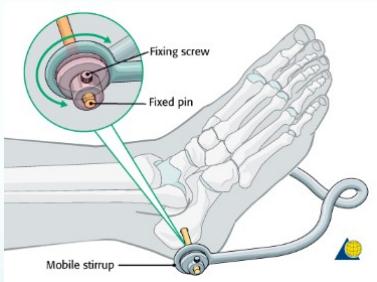
- Stirrup
Technique:
- Give adequate sedation if needed
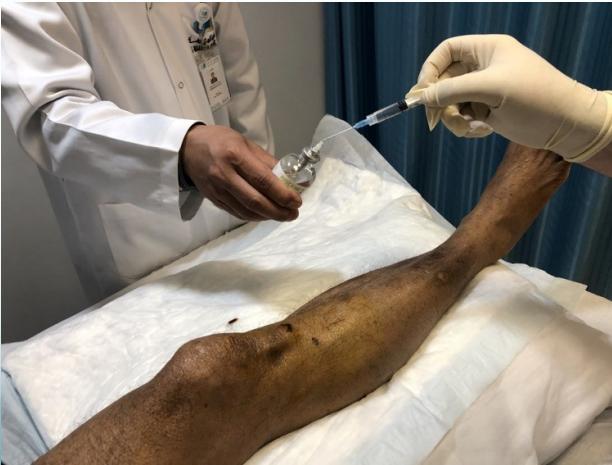
- Paint the skin with antiseptic, drape with sterile towels
- Inject local anesthesia (5 ml of 2% lignocaine) into skin at proposed site of pin insertion & anticipated exit point down to the periosteum
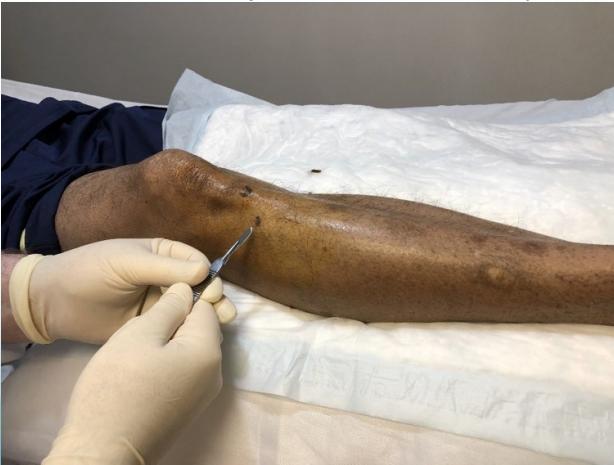
- Make a stab incision through the skin with a pointed scalpel
- Connect a Steinmann pin in the T-handle (or drill)
- Insert the pin into the entry point
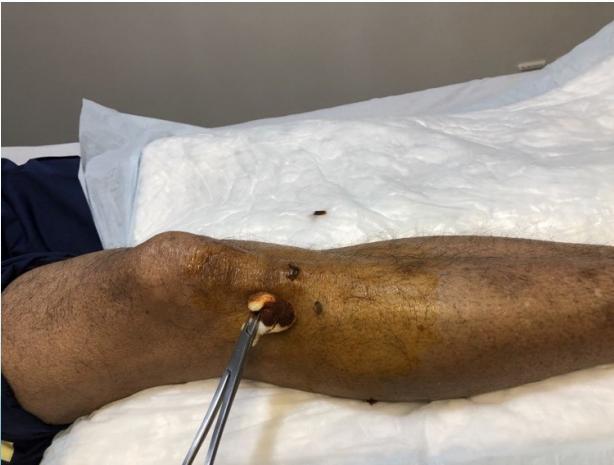
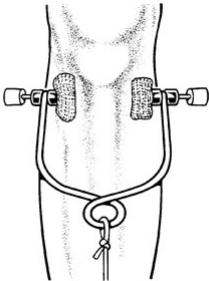
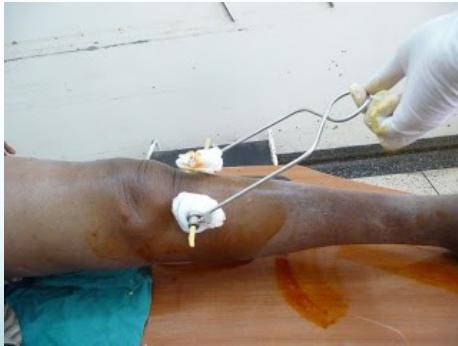
- As the pin penetrates the far cortex and elevates the skin, make a small stab incision in the overlying skin
- Apply sterile gauze on the skin around the pin on both sides
- Apply stirrup on both ends of the pin, and apply the cord on the stirrup, with weight attached over pulleys (10% of patient’s body weight)