Knee Examination - V1
OSCE Knee Examination
1. Introduction
- Introduce yourself
- Wash hands
- Briefly explain to the patient what the examination involves
- Ask the patient to remove their bottom clothing, exposing the knee
2. Inspection (whilst patient standing)
- Patient gait Assess for:
- Asymmetry
- Deformity
- Muscle bulk
3. Inspection (whilst patient supine)
- Assess for:
- Scars
- Symmetry
- Swellings
- Skin changes
4. Palpation
- Temperature
- Joint swelling
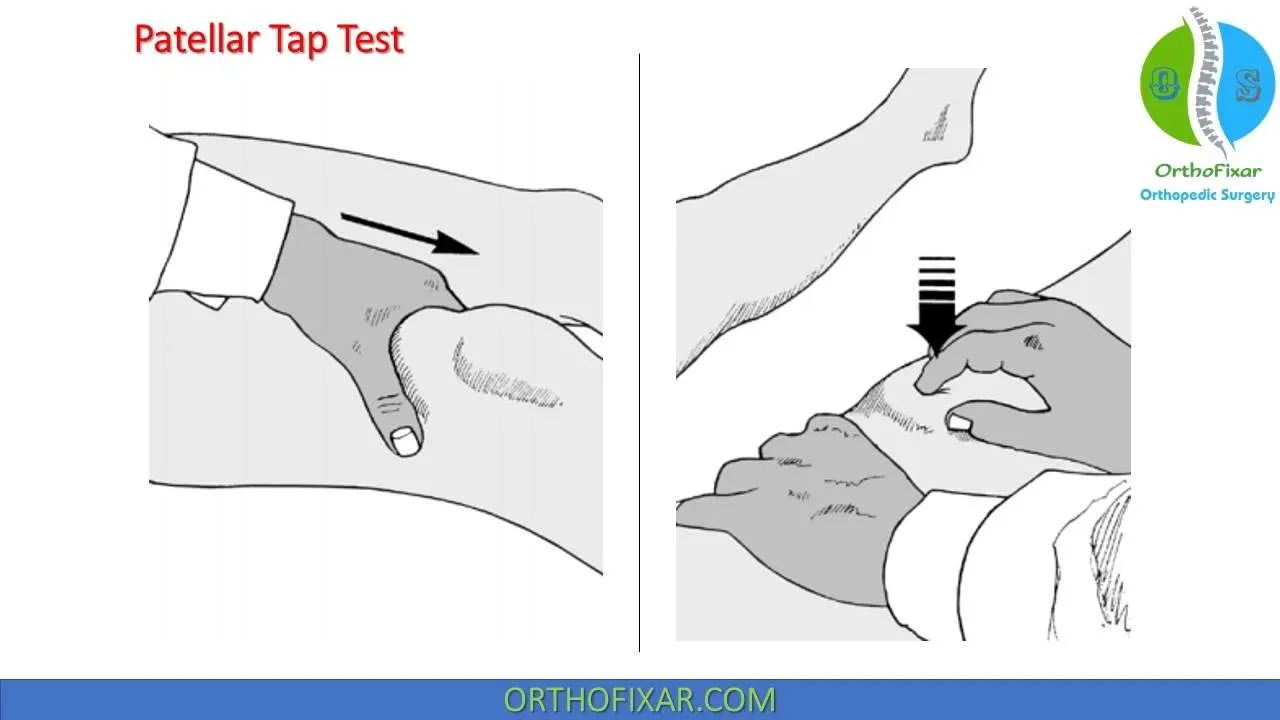
- Patella Tap
- Bulge Test (assesses for smaller effusions)
- Palpate:
- Quadriceps muscle and quadriceps tendon
- Patella and patella ligament
- Tibial tuberosity
- Joint line
- Medial and lateral collateral ligaments
- Popliteal fossa
5. Movement
- Straight leg raise
- Check passive movements:
- Flexion and extension
- Check active movements:
- Flexion and extension
- Flexion and extension (against resistance)
6. Special Tests
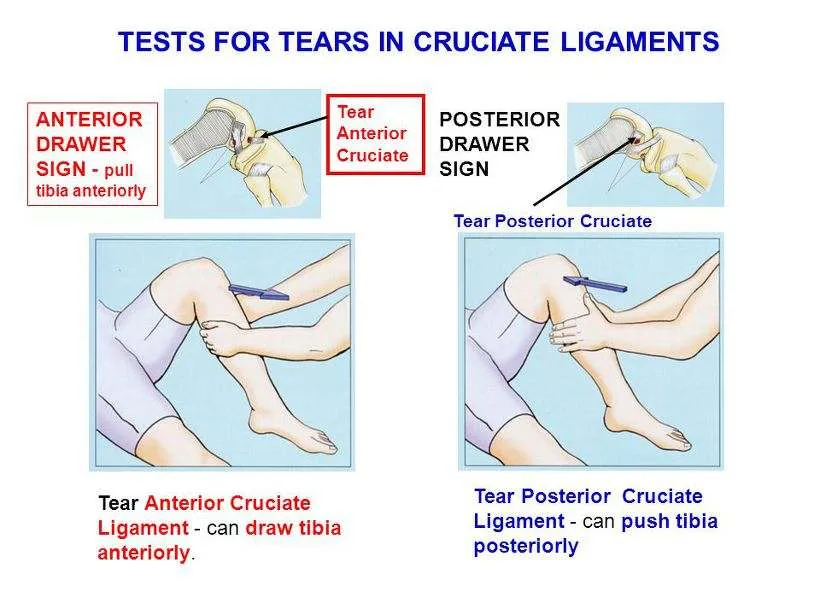
- Anterior and Posterior Drawer Tests
- Lachman’s Test
- Varus and Valgus Stress Tests
- Complete the Examination
Examination Steps
- Thank the patient and allow them to redress
- Examine the hip and ankle joints
- Total
Knee Examination - V2
If going step up, knee pain, step down hip pain.
Gait
Squat
Knee Examination
Washes hands/uses alcohol rub before and after knee examination.
General Assessment
- General appearance
- Vital signs
- BMI
Inspection
- Gait: deformities (Varus vs. Valgus)
- Skin changes:
- Scars
- Redness
- Rashes
- Effusion
- Muscle wasting
- Any joint deformities
- Popliteal swelling: Baker’s cyst
- Compares both sides.
Palpation
- Asks if the patient is in any pain.
- Assesses skin temperature.
- Palpates joint line and surrounding structures.
- Temperature
- Tenderness over:
- Tibial tubercle
- Patella and patellar tendon
- Joint line
- Medial and lateral sides of the joint
- ?bursitis
- Effusion:
- Bulge/Sweep test (for minimal effusion)
- Patellar tap test (for large effusion)
Movement
- Examines active and passive flexion and extension.
- Checks for crepitus.
Cruciate Ligament Assessment
-
Assesses cruciate ligament tears using:
- ✓ Anterior drawer test: performed with knee in 90° flexion and foot flat on the couch by pulling the tibia anteriorly.
- Posterior drawer test: also performed with knee in 90° of flexion by pushing the tibia posteriorly.
-
Examines popliteal fossa.
-
Performs knee reflex test.
Inspection Details
- Erythema
- Swelling
- Bruising
- Lacerations
- Gross deformity
- Discoloration
- Any asymmetry of bony or soft tissue landmarks, including atrophy and valgus or varus deformities, should be noted.
Palpation Details
- Palpation should assess for pain over all bony and soft tissue landmarks, warmth, and effusion.

Range of Motion and Strength Test
- Range of motion (active and then passive) should be used to assess flexion and extension of the knee.
- Normal limits of knee range of motion include:
- Extension from 0 to –10°
- Flexion to 135°
Patellar Tap Test
Collateral Ligament Tests
- Palpation should assess for pain over all bony and soft tissue landmarks, warmth, and effusion.


Anterior & Posterior Drawer Tests
Tests for Tears in Cruciate Ligaments
- Anterior Drawer Sign: pull tibia anteriorly.
- Tear Anterior Cruciate Ligament: can draw tibia anteriorly.
- Posterior Drawer Sign:
- Tear Posterior Cruciate Ligament: can push tibia posteriorly.