Eyes Examination
- Inspection
- Visual Acuity
- Refraction
- Intraocular pressure
- Alignment & Motility
- Pupillary Response
- Fundoscopic Exam - Retinal Exam
- Visual Fields
Fundoscopic Exam of the Eye
Fundoscopic Exam
- Lights are dimmed
- Holds and positions ophthalmoscope properly and uses index finger to switch lens
- Examiner uses R hand R eye to look in R eye
- Inspects anterior structure with ophthalmoscope - R eye (Start +15-40 to see anterior structures and move toward 0)
- Inspects optic nerve - R eye (comes in at 15° with lens at 0 or moving from the positive toward 0)
- Traces vessels to all four quadrants - R eye
- Observes macula - R eye (Credit to be given if #28 and look laterally)
- Examiner uses L hand L eye to look in L eye
- Inspects anterior structure with ophthalmoscope - L eye (Start at +15-40 to see anterior structures and move toward 0)
- Inspects optic nerve - L eye (Comes in at 15° with lens at 0 or moving from the positive towards 0)
- Traces vessels to all four quadrants - L eye
- Observes macula - L eye (credit to be given if #33 and look laterally)
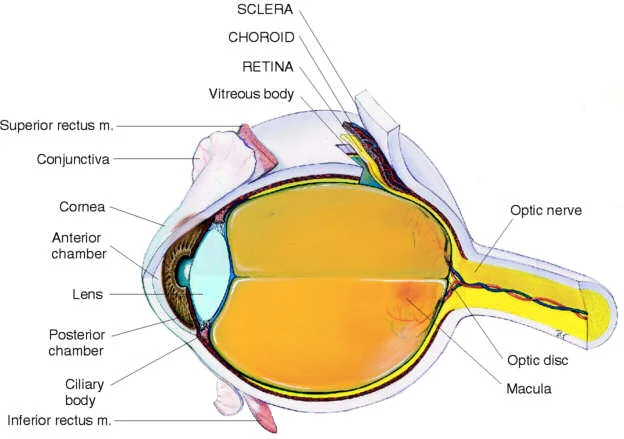
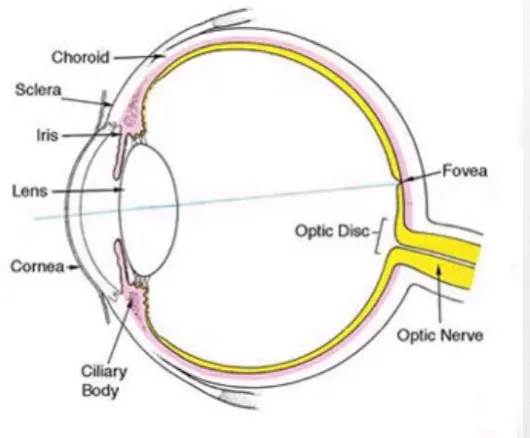
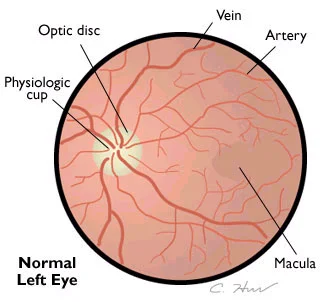
Internal Anatomy of the Eye
During the Fundoscopic Exam the ophthalmoscope may be used to visualize the following structures of the eye:
• Optic disc
- Disc outline
- Color
- Physiologic cup
• Retina
- Vessels
- 4 quadrants
- Fovea and macula
• Anterior structures
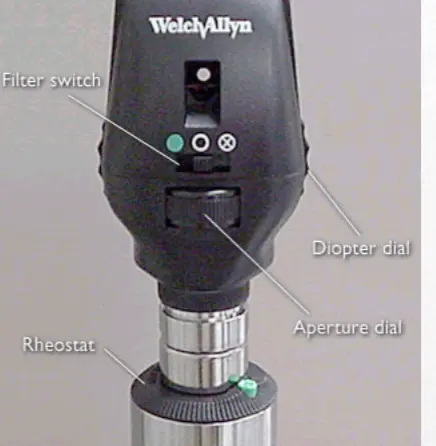
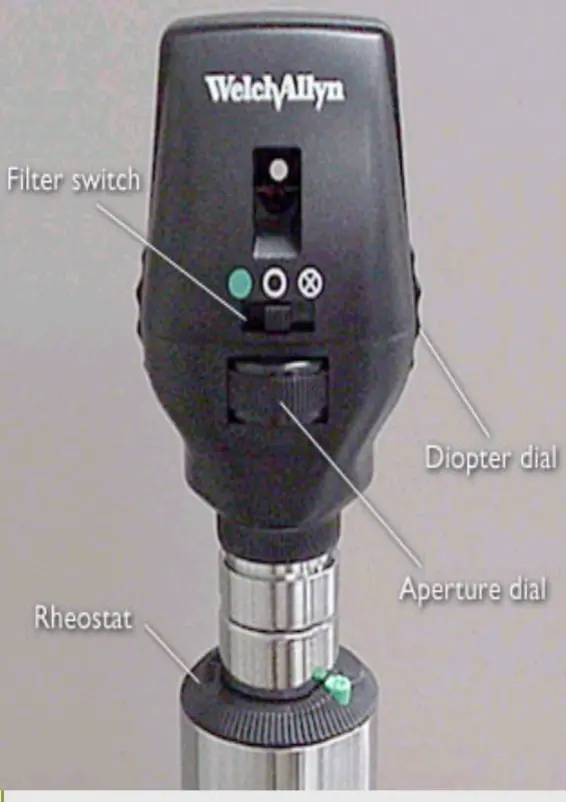
Ophthalmoscope
Lenses (Magnification power of lens = diopters)
- Controlled by diopter dial
- Black or green numbers: positive numbers — counterclockwise — plus lenses
- Red numbers: negative numbers — clockwise — minus lenses
Light source
- Brightness controlled by rheostat
Various apertures
- Large – usually use this one
- Small – for small pupils
- Red free filter – green beam, highlights optic disc pallor and minute vessel changes
- Slit – for anterior eye, elevation of lesions
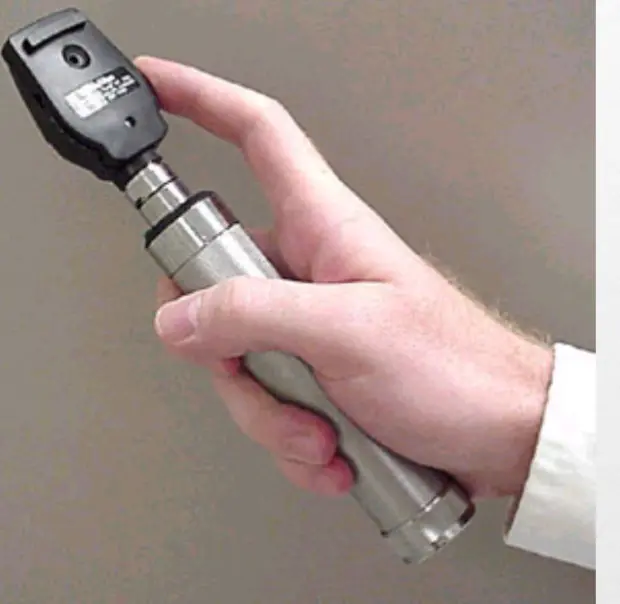
Holding the Opthalmoscope •Use the index finger to change lenses (diopters)
- Fundoscopic Examination
- Darken the room
- Place the opthalmoscope to 0 diopters and the large round beam
- Keep index finger on lens disc
- Use R hand for pt’s R eye and L hand for pt’s L eye
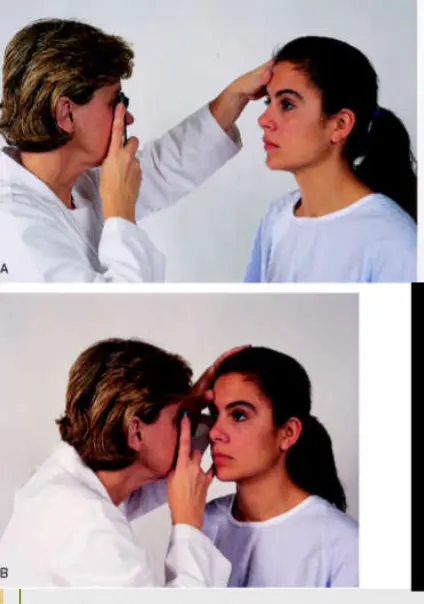
- Ask pt to fix gaze on a spot on the wall
- From about 15” away and about 15o lateral look into pt’s eye
- Observe the red reflex and then move in closer
- You may rest your opposite hand on the pt’s forehead above the eye to help guide
- Move the opthalmoscope very close to the pt’s eye
- If you initially see blood vessels, you can follow the blood vessels toward the disc.
- They flow like rivers toward the disc.
- Diopters may need to be adjusted to obtain a good focus
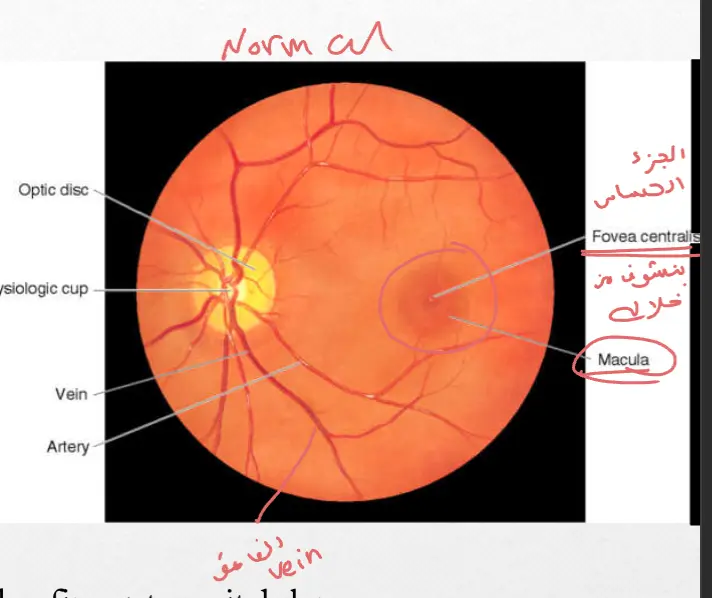
Ophthalmology Examination Guide
Normal Left Eye
Key Observations
-
Once you see the disc, you should note its color and note what percent of the physiologic cup involves the disc.
-
The cup-to-disc ratio should be less than 0.6.
-
You should note the size of the arterioles as compared to the veins. They should be 2/3 to 4/5 the size of veins.
-
Next look in all 4 quadrants of the retina
-
Finally, look at the fovea and macula. This may be accomplished by asking the pt to look at the light
Fundus Examination
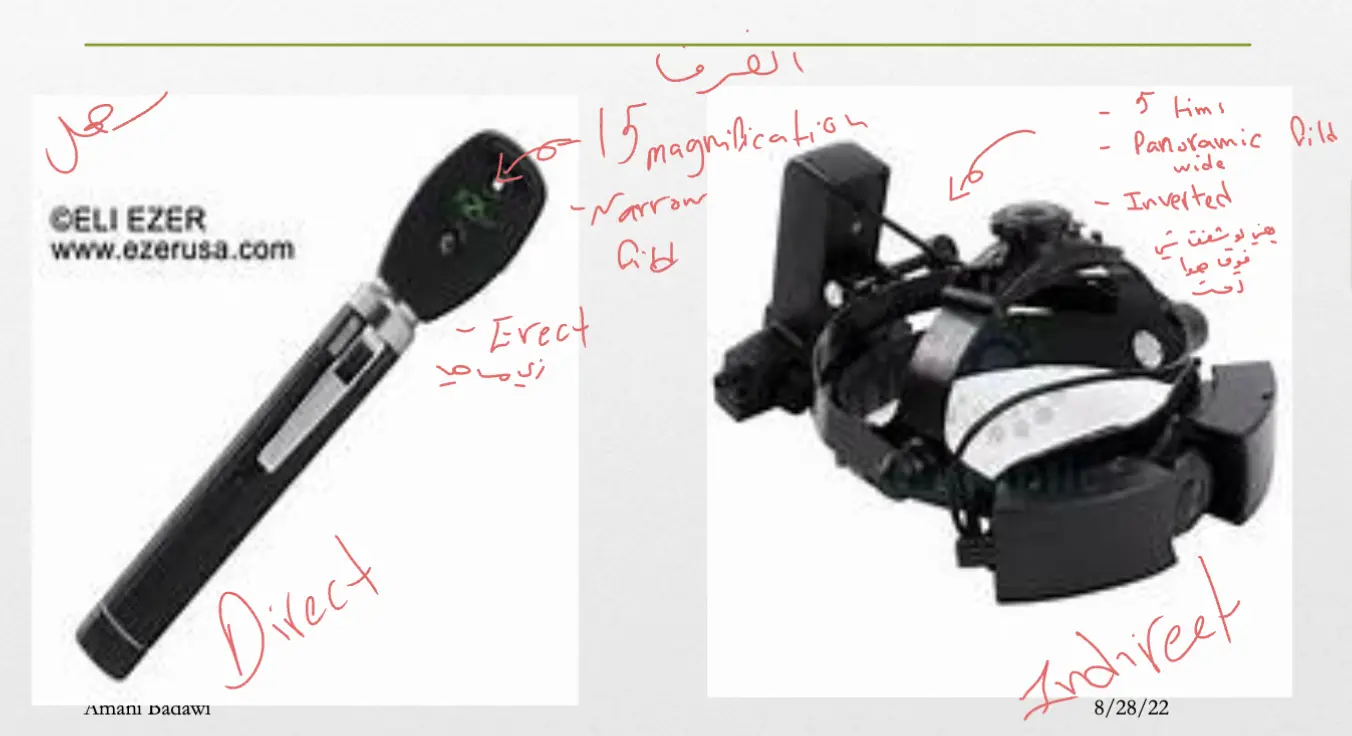
-
Direct: 15 times (Narrow field) ~ Erect Image
-
Indirect: 3-5 times (Wide field / panorama view) ~ inverted image