preparation & Tools of LP
Prepare patient, make sure theres I.V. line acess
-
Explain the procedure in advance and discuss each step to reduce anxiety. and the possible common complication might happen.
-
Inquire about allergies to anesthetics.
-
Informed consent.
Steps of LP
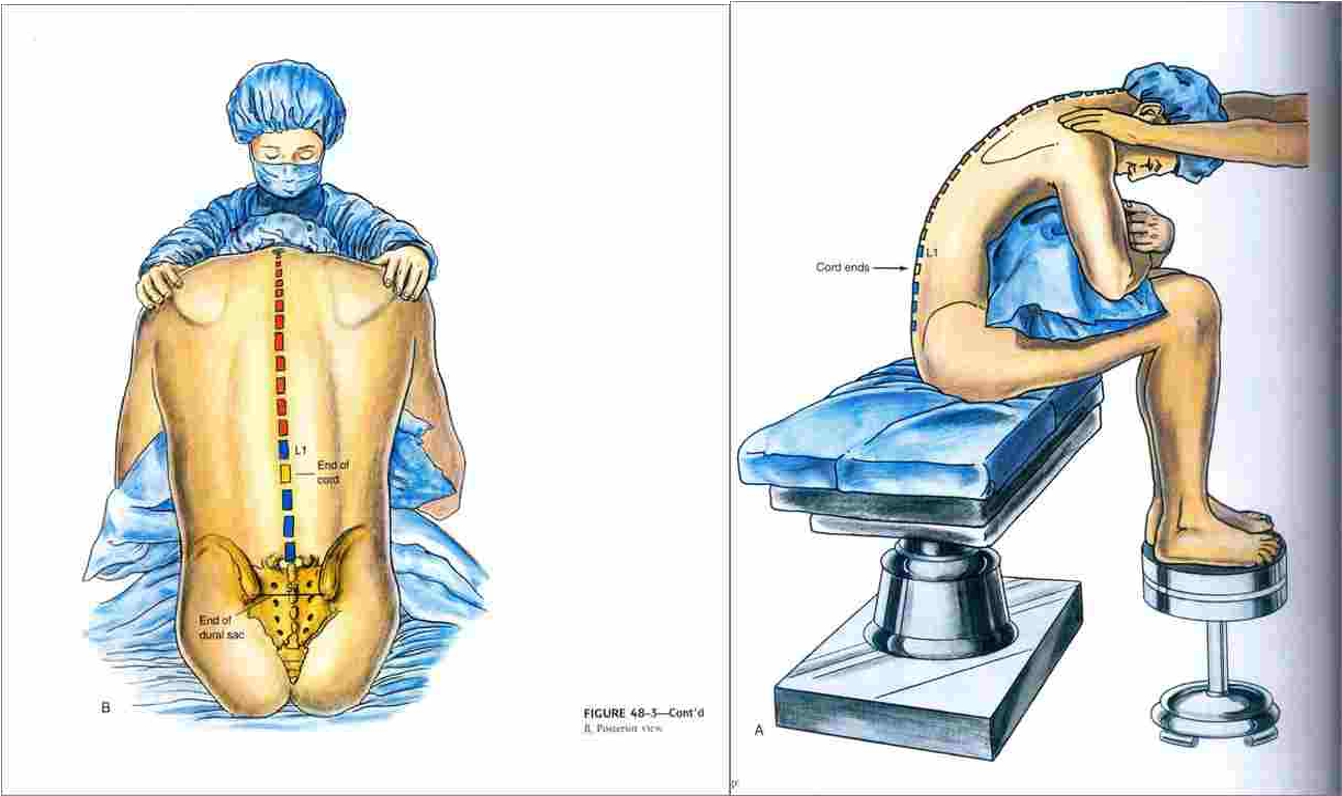
There are two positions.
The preferred position is lying on their side (left lateral) with the patient’s legs flexed at the knee and pulled in towards their chest, and upper thorax curved forward in an almost fetal position.
The second position is the upright or sitting position. Sit the patient on the edge of bed, with their legs resting on a stool or chair, ask them to roll their shoulders and upper back forwards and the chair is positioned to bring the thighs up towards the abdomen.

Site of injection
Locating the correct entry point is performed by identifying the surface anatomy of L4. This is done generally by palpating the iliac crests.
An imaginary line between the highest points of the iliac crests usually corresponds to L4 . The interspace of L3/L4 or L4/L5 are used as entry points.
Structures you pass through them When doing LP Skin Subcutaneous tissue Supraspinous ligament Interspinous ligament Ligamentum flavum Epidural space. Dura mater and Arachnoid mater
-
Ligament flavum is a strong, elastic, yellow membrane covering the interlaminar space between the vertebrae.
-
Interspinal ligaments join the inferior and superior borders of adjacent spinous processes.
-
Supraspinal ligament connects the spinous processes.

Lumbar Puncture Techniques
- Wearing nonsterile gloves.
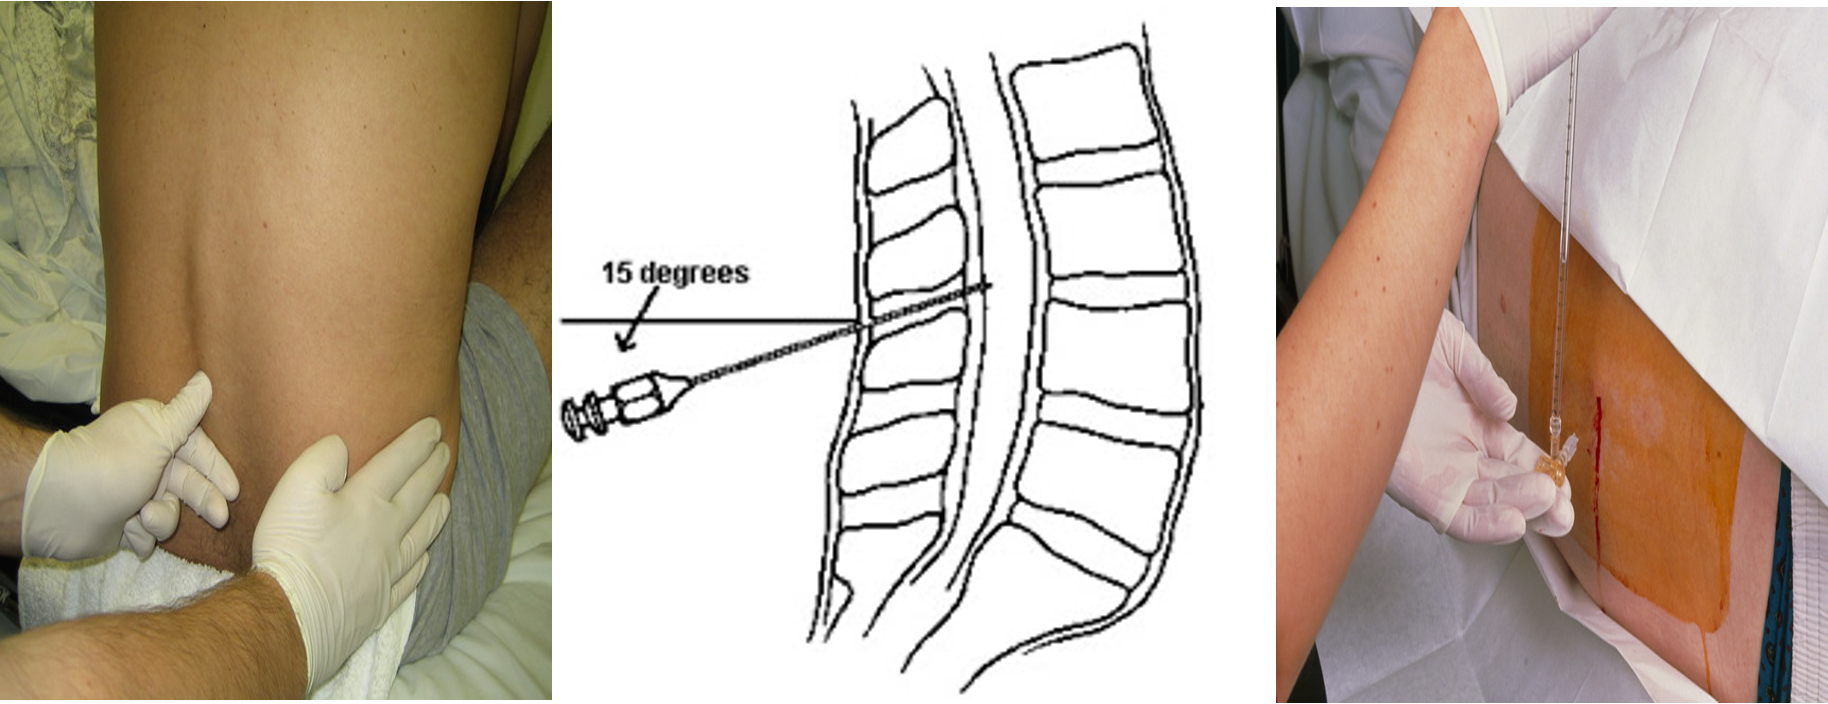
- locate L4 by palpating the right and left posterior superior iliac crests and moving the fingers medially toward the spine.
- Palpate the above interspace (L3-L4) and the below interspace (L4-L5) to find the widest space.
- Mark the entry space with a thumbnail or marker.
- Open the spinal tray.
- change to sterile gloves and prepare the equipment.
- Open the numbered plastic tubes and place them upright.
- Assemble the stopcock on the manometer.
- draw the lidocaine into the 10-mL syringe.
Use the skin swabs and antiseptic solution to clean the skin in a circular fashion, starting by the point of L3-L4 interspace and moving outward to include at least 1 interspace above and 1 below.
Place a sterile drape below the patient and a fenestrated drape on the back of the patient.
Use the 10-mL syringe and the 25-gauge needle to administer a local anesthetic. aspirate to confirm that the needle is not in a blood vessel, and then inject a small amount as the needle is withdrawn a few centimeters.
Continue this process above, below, and to the sides very slightly (using the same puncture site).
This process anesthetizes the entire area if redirection of the spinal needle is necessary, the area will still be anesthetized
stabilize the spinal needle with the index fingers and advance it through the skin using the thumbs.
in the lateral recumbent position the bevel should face up, and in the sitting position, it should face to one side or the other.
Insert the needle at a slightly cephalad angle, directing it toward the umbilicus.
Advance the needle slowly. and smoothly occasionally when a characteristic “pop” is felt. And that means the needle penetrates the dura.
withdrawn the stylet after approximately 4-5 cm and observe the CSF.

-
If no CSF , replace the stylet and advance or withdraw the needle a few millimeters, and recheck for CSF.
-
Continue this process until CSF is successfully returned.
-
For measurement of the opening pressure, after the CSF is returned from the needle, attach the manometer through the stopcock, and note the height of the fluid column.
-
Collect at least 1ml of CSF in each tube, starting with tube 1.
-
If possible the CSF in the manometer should be used for tube no 1.
-
If the CSF flow is too slow, ask the patient to cough or bear down to increase the flow.
-
Replace the stylet, and remove needle in one quick motion.
-
Cleanse the back of the Pt and cover puncture site and place
-
the pt. in supine position.
Collect 1ml of CSF in each tube for:
- Tube 1: culture & gram stain
- Tube 2: glucose, protein
- Tube 3: cell count & differential
- and extra CSF if desired for other lab test
Complications
- Headache (most common)
- Epidural or subarachnoid hematoma
- Spinal cord trauma
- Infection
- Back pain (most common)
- Hypotension, bradycardia.
How to minimize the headache?
- choice of needle standerd Quinck versus atraumatic .
- decrease the number of attempts.
- reinsersion of the stylet.
- bed rest after the procedure.
Steps #2
-
Wash, Introduce, Explain, take consent - then prepare exposure and position.
-
Feel the pelvis after position - iliac crest will pass by L4 - then trace your fingers downwards by one process for L3. then mark it
-
Start sanitising the area three times from Inside to outside best circular motion - start centrally then peripherally
-
use sterile paper drape after sanitizing the whole back - centrally to the mark
-
Inject local Subcutaneous (30 degree) anaesthetics (lidocaine) to the area
-
Take Spinal needle - injecting in 15 degree from 90 degree angle of the back with projection of spine; till you feel pop the injection has reached to the space - then collect the fluid sample - dont pull puncture until its fully secured to prevent complications